Are you ready to implement interactive notebooks in your classroom? If so, there are a few key tips and tricks I’d like to share to help you make the most out of them!
In part 1 of my 3-part interactive notebook blog series, I broke down exactly how to get started with interactive notebooks. I went over everything from the benefits and materials to actual prep and set up.
Today, I’m going to share some teacher-proven tips and tricks that I have learned throughout the years for storing, organizing, using, and teaching interactive notebook procedures effectively in part 2 of the blog series.
I’m also going to be sharing a few examples from teachers in my Saddle Up For 2nd Grade Teachers Facebook Group so you can see how other teachers approach them.
Once you’ve prepped your interactive notebooks, it’s time to help your students set up their interactive notebooks for success.
The first thing you want to consider in order to help your students set their interactive notebooks up for success and effective use is how they will organize their pages.
A table of contents is a great way to organize the activities and concepts inside of the interactive notebook. Students can create a table of contents by simply writing on the lines of their notebook or by writing on a blank table of contents template.
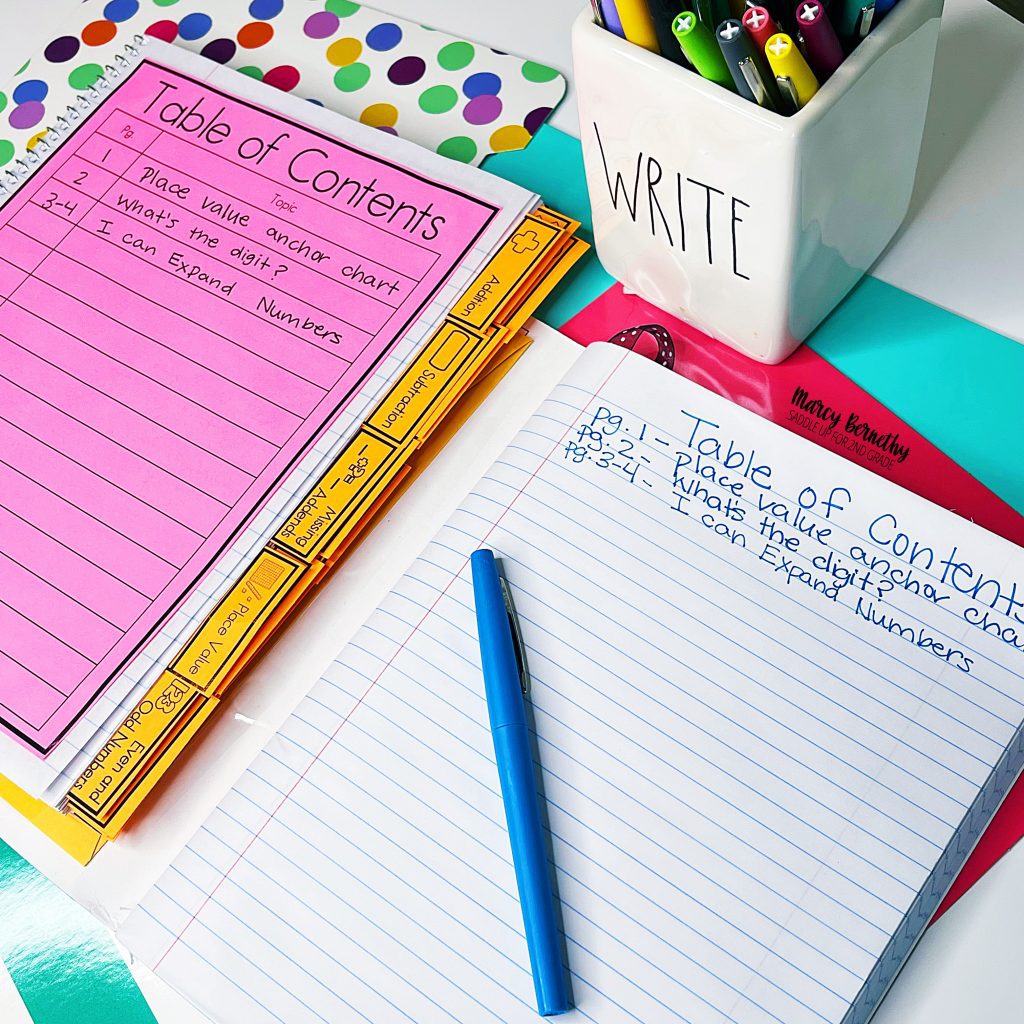
If your students are younger, using a table of contents template may be most effective. If they are older and can write on the lines neatly, they may not need that. It is totally your teacher preference and what will work best for your students.
Since an interactive notebook is something your students will add to throughout the year, it’s a good idea to designate 5 blank pages for your table of contents.
Like I mentioned, your students will add to and use their interactive notebooks throughout the entire year. Therefore, they need to be able to easily find different pages and activities.
I like to have my students number all of the pages in their interactive notebook by writing a number in the top left or right-hand corner. With older students, you can have them number several pages at a time. With younger students, I like to have them number 10 pages at a time.
They can record the page number of each activity in their table of contents for better organization. After completing each activity, students can use their interactive notebook bookmark to save their place for next time.

Numbering the pages in your interactive notebooks is great for classroom management as it helps students know exactly where to go in their notebook each day without having to ask or waste time flipping through to find the next available page.
You can also implement concept tabs to help organize your interactive notebooks further. Concept tabs help organize the activities in the interactive notebook based on concept.
For example, all time activities will be stored together. All money activities will be stored together, and so on.
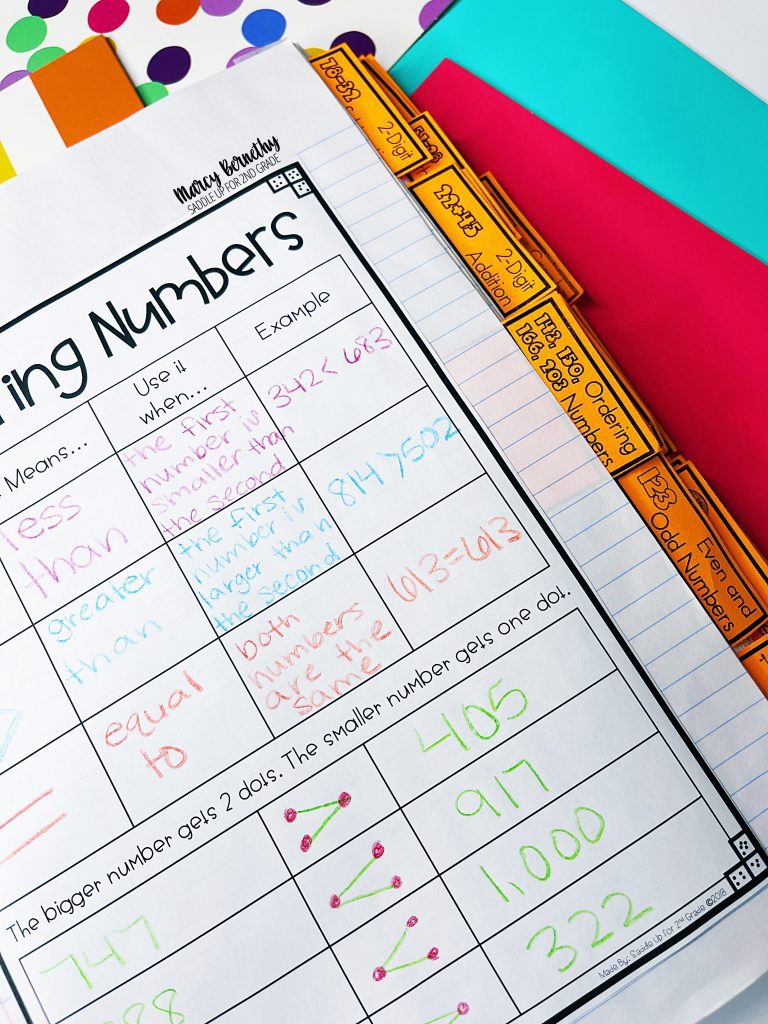
If you decide to implement concept tabs in your interactive notebooks, I recommend not adding all of the tabs at once. You never know how many pages you’ll need for each concept, so I like to add a new concept tab each time a concept is introduced.
You can see how Michelle C., a teacher in my Facebook Group, uses concept tabs in her interactive notebooks with these comparing numbers interactive notebook activities below.

When it comes to organizing interactive notebooks, there are so many ways to approach it. I’ve found the most effective way is to choose a color for each subject. For example, my math interactive notebooks were always blue.
Instead of asking each student to bring a blue notebook, simply color the spine of each student’s notebook with a permanent marker in the subject color. That way, students can easily find their math notebook in their desk or cubby.
You can also add a label to the spine of the notebook with each student’s name. This works well if you choose to organize your interactive notebooks in a magazine holder, book box, basket, or drawer.
If you teach a self-contained class, there are several options for storing your interactive notebooks. You may choose to have students keep them in their desk or in a subject-specific basket.
If you are departmentalized, you’ll probably want to store your interactive notebooks in some sort of basket, drawer, or book box so the students can keep them in your classroom and not have to transport them daily.
If possible, prep interactive notebook materials ahead of time. This will save your students a ton of time from having to prep every single piece. However, I also know that as teachers, you don’t have a ton of prep time!
That’s why I recommend using interactive notebook activities that include simple, straight lines. My guided math units include easy to prep interactive notebook activities and activities that have large pieces that only require one cut, so you don’t waste a ton of time.
You can cut out pieces and have them in a stack so students can easily grab one and go. For sorting activities, I like to cut out the pockets and then let the students cut out the smaller pieces that they’ll sort.
As you go, you’ll learn what works best for you and your students.
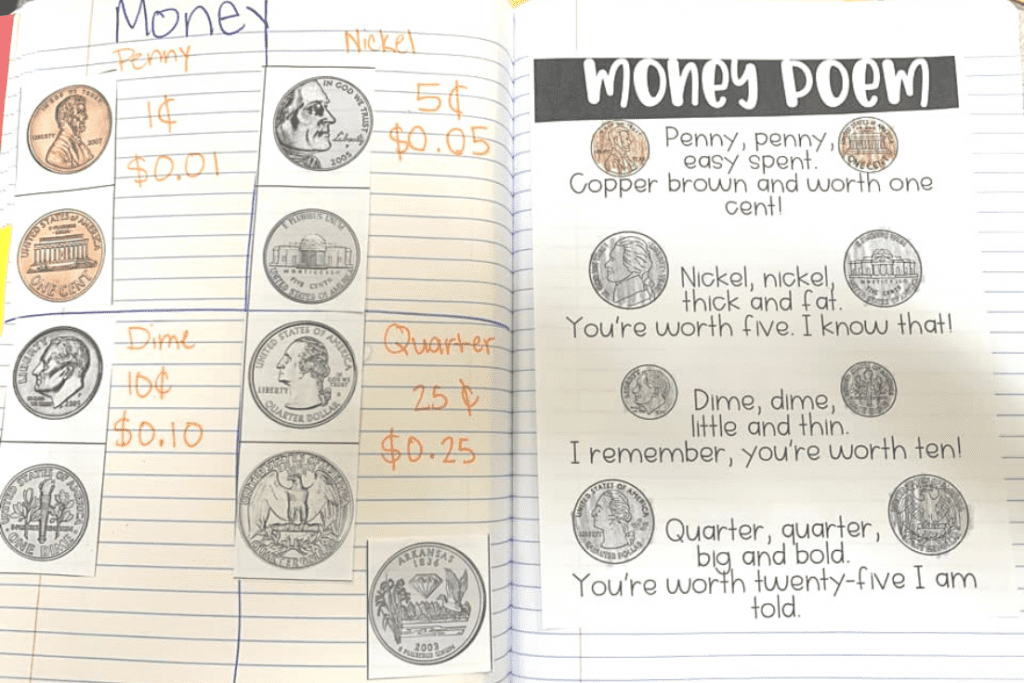
The example from Michelle C. below shows how easy it is to prep large pieces, like the money poem interactive notebook activity. It’s just one large cut and students are done!
The last thing you want when using interactive notebooks is a sticky, gluey mess. Bottled white glue can take a long time to dry, and let’s face it, students seem to always get too much.
That’s why I recommend using glue sticks or glue sponges for all of your interactive notebook gluing needs. You can check out how to make your own DIY glue sponges in this blog post.
This helps students use just the right amount of glue and speeds up the process.
Interactive notebooks are so fun and effective for students, but the worst thing that can happen is students not having what they need and spending their entire math block searching for supplies.
Using table caddies is a great way to keep all of your interactive notebook supplies together. Add scissors, glue, tape, pencils, and crayons to a caddy to place on each student table. That way, students always have everything they need right at their fingertips.
On the same note, nothing can drive a teacher crazy like a tornado or paper scraps flying around. Instead of having a messy room or students getting out of their seat multiple times to throw scraps and trash away, use a tidy tub on each table for students to toss their scraps in.
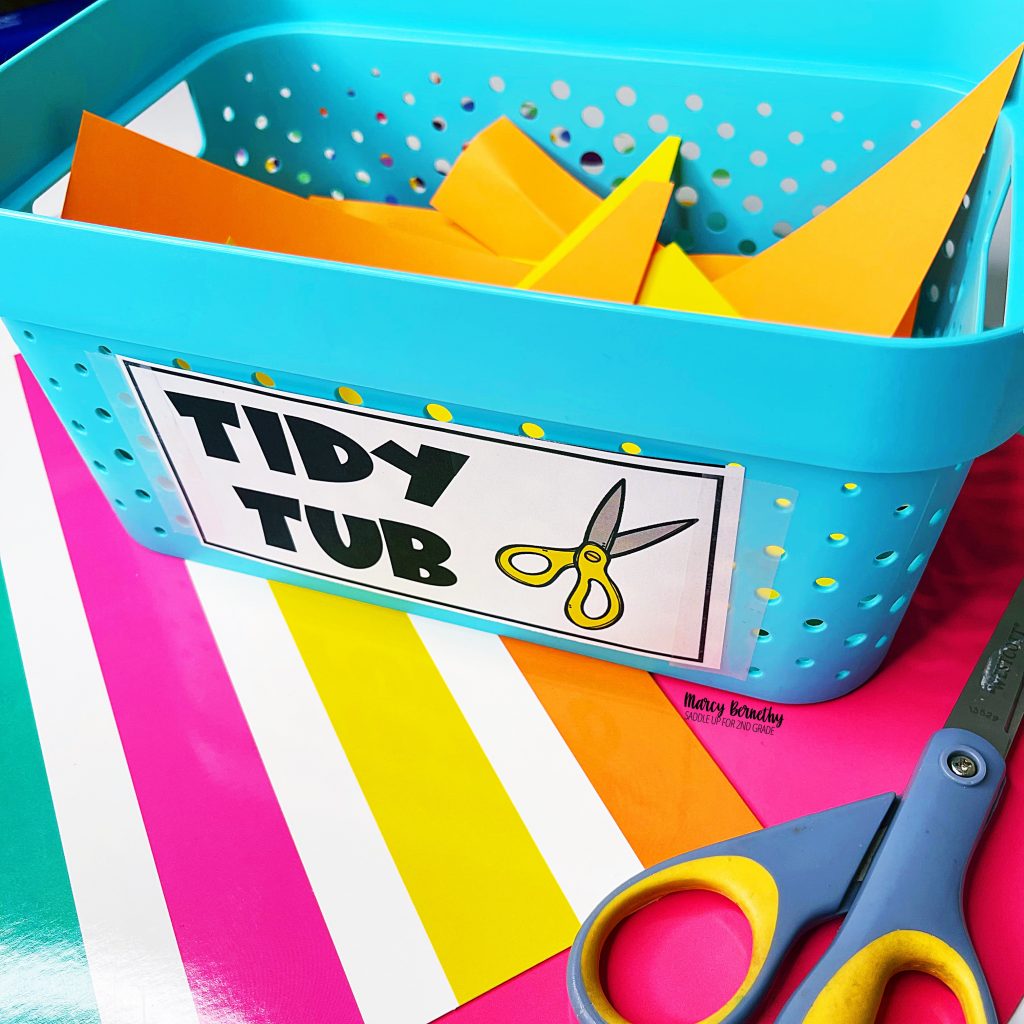
Plastic buckets (like the ones you can find at the dollar store) work great for tidy tubs. At the end of class, have one student empty the tidy tub in the trash and return it for next time.
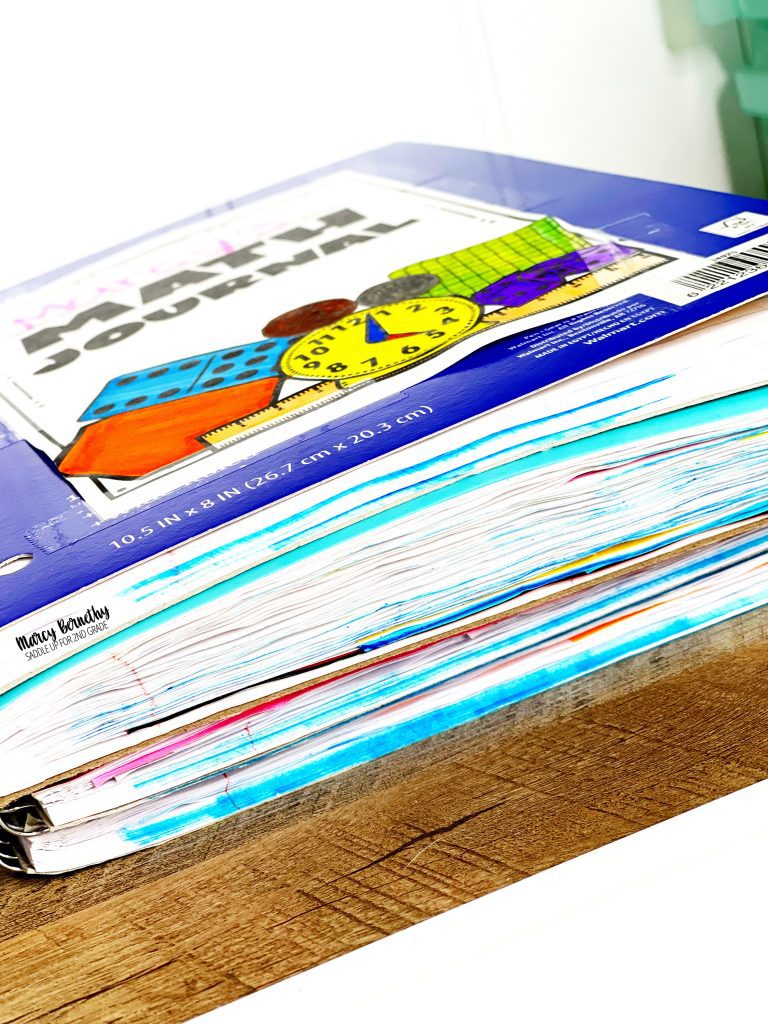
It is so handy to have a master copy of your own teacher interactive notebook. Since you’ll be using interactive notebooks year to year, you can easily refer back to what you did and when.
This is also helpful for students to see how YOU set up your interactive notebook. It gives them a visual of what theirs should look like.
If students are completing interactive notebook activities independently during math stations, you can include your interactive notebook master copy as a reference for students to see your example.
Managing interactive notebooks is just like everything in the elementary classroom. You MUST establish and teach routines and procedures so that your students know exactly what is expected of them.
Teach and model for students how to use interactive notebooks, how to prep and store materials, how to glue pieces in, where to store them when they’re finished, etc.
Organization is a learned skill, so be patient and keep practicing consistently. Lastly, remember to always be realistic with your students and yourself.
The first couple of times may be a little rocky. However, with consistent use and practice, students WILL get better, more organized, and faster at using interactive notebook activities.
Give yourself some grace and don’t strive for perfection, especially when you’re just getting started.
I hope these interactive notebook tips and tricks help you implement, store, and organize them even more effectively in your classroom!
To dive into these tips and tricks further, head on over to my YouTube channel and check out my video where I explain and show examples for these 8 tips.
In the final post in this interactive notebook blog series, I’ll be sharing a ton of different ways to use interactive notebooks with your students.
Did you miss Part 1: Getting Started with Interactive Notebooks? Check out that post here!
Feel free to pin the image below to come back to this post later!