
As teachers, we’re always juggling a million little tasks, from keeping track of homework and progress monitoring to collecting permission slips and more. If you’re anything like me, your desk can quickly become cluttered with sticky notes, and when it’s time to find what you need, it’s gone. That’s where a simple checklist can be a total lifesaver! And one of the easiest ways to make one is right inside Google Sheets! In this blog post, I’ll show you step-by-step how to create a checklist in Google Sheets (with checkboxes!), plus share ideas for how you can use them in your classroom.
Want more tips for using Google apps as a teacher? Check out these blog posts:

Checklists keep your classroom (and your brain!) organized. But it can take forever to write out exactly what you want to include on a checklist on paper. And finding a checklist template online that has everything you need, and that can be customized to your students’ names can be a challenge. Oftentimes, the templates you find online just aren’t formatted to your liking.
A digital checklist in Google Sheets is a great option if you’re looking for something that’s:
There are endless ways to use a Google Sheets checklist in your classroom, but here are a few of them (that I have personally used):
Want to skip the steps for creating your own? I’ve got you covered with these premade, fully editable, Google Sheets Checklists for Teachers! Choose your favorite color scheme (black and white, rainbow brights, calm pastel, or boho neutral) and all of your own text!


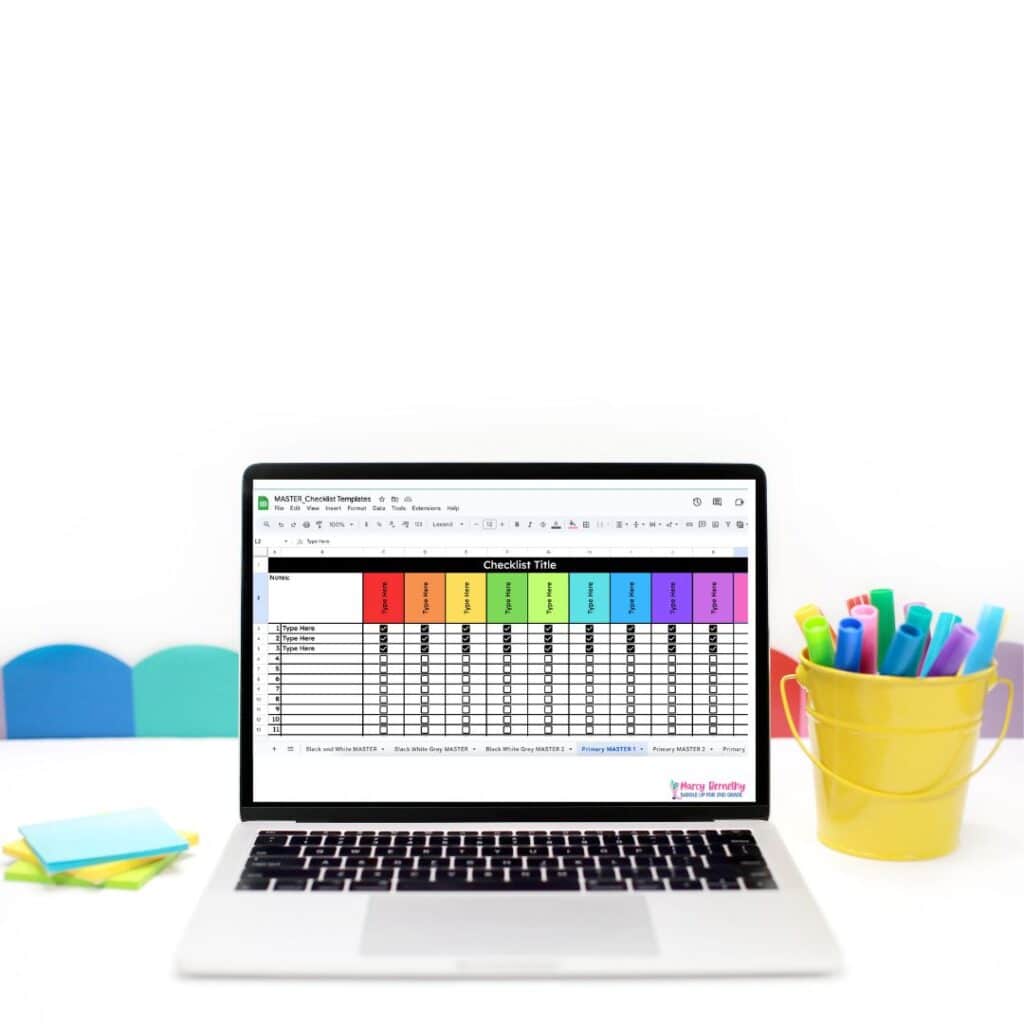

I’ve even included a half sheet option that would allow you to create your customized classroom list and print two per page. But if you want to create your own, keep scrolling to learn how!


First, open up a new Google Sheet and name it at the top. The fastest way is to type sheets.new into your browser. This opens a fresh spreadsheet that’s ready for you to customize. Isn’t that a great teacher tech hack?!


To organize your columns, think of it like a gradebook:


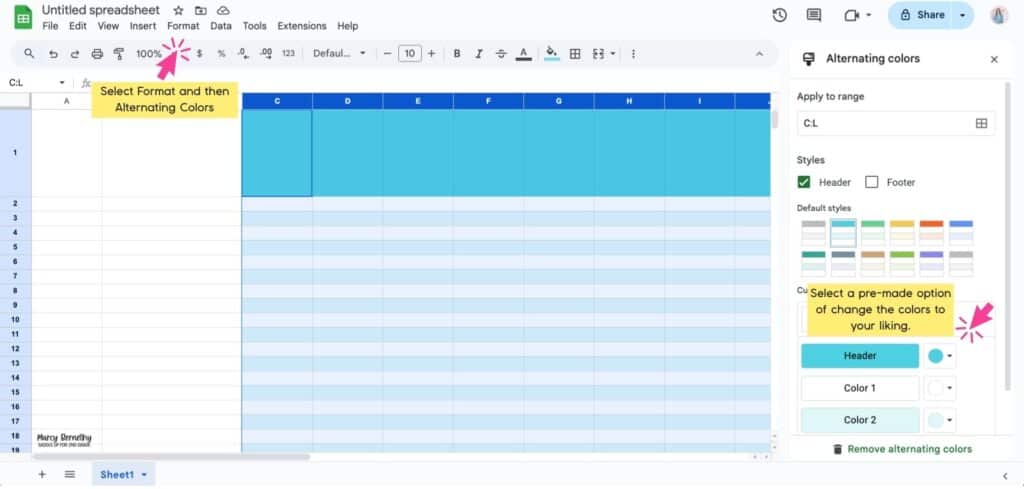
Pro Tip: Add alternating colors by highlighting everything and clicking Format → Alternating colors to make rows easier to scan.


And that’s it… your Google Sheets checklist is ready to use! Student names, tasks, and checkboxes all in one place!

The best part about using Google Sheets checklists is that you can save them and reuse them. No more starting from scratch every time.
Here’s how to use your Google Spreadsheet checklist template:
This creates a master template you can reuse endlessly.
Want a paper version of your Google Sheets checklist to share with parents, admin, or other team teachers?
Go to File → Print and adjust:
Note: Different printers will have different settings. If fit to page doesn’t work for you, try a different setting until it looks normal.

Learning how to create a checklist in Google Sheets is a game-changer for teachers. You can track assignments, stay on top of paperwork, and keep your classroom running smoothly, all with one simple spreadsheet.
Another great way to utilize Google Sheets checklists in your classroom? To keep track of the resources you’ve downloaded, printed, and prepped from inside Inner Circle Math Membership!
This membership is packed with guided math units (AKA – done for you math lessons), math centers, math organization resources, games, planning tools, and MORE to save you hours each week.
And because giving teachers access to differentiated resources is so important to me, you’ll get instant access to ALL of my resources for 1st-3rd grade when you join for just $10.99 a month. It’s all in one place so you can easily search, browse, download, and teach!
Love this post? Save it to your favorite Pinterest board so you can revisit this Google Sheets checklist tutorial any time you need!